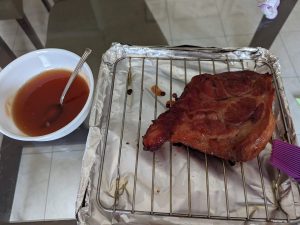
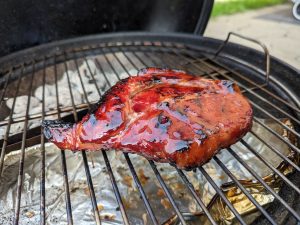
Smoked Gouda Cheese Dip appetizer

Smoked Gouda Cheese Dip

Created as an appetizer for our Christmas party, the Stonevy Smoked Gouda Cheese Dip effortlessly steals the show. Crafted for simplicity, this easy-to-make dip features the luxurious richness of our shredded Stonevy Double Smoked Gouda and a generous sprinkle of crispy bacon bits. A crowd-pleaser for all ages, the irresistible allure of this dip keeps the kids coming back for more, making it the perfect holiday indulgence for gatherings that demand both ease and exquisite taste.
Prep Time 10 minutes
Cook Time 15 minutes
Course Appetizer
Servings 8 people

Ingredients
  

  • 250 g Cream cheese
  • 1/2 cup Sour cream
  • 1/2 cup Mayo
  • 1 cup Stonevy Shredded Smoked Gouda cheese
  • 1/2 cup Real bacon bits - lightly pan fried/toasted
  • 1/4 tbsp garlic powder
  • 1/4 tbsp salt
  • 1/4 tbsp pepper
  • 2 green onions for garnish, chopped

Instructions
 

  • Soften cream cheese at room temperature for 30min to 1 hour (easier if it's chopped in smaller chunks)
    250 g Cream cheese
  • In a cool pan, lightly toast bacon bits for few minutes, then cool for later use
    1/2 cup Real bacon bits - lightly pan fried/toasted
  • In a medium bowl, use a hand mixer or two spoons to combine the cream cheese, sour cream, and mayo until completely smooth.
    1/2 cup Sour cream, 1/2 cup Mayo, 250 g Cream cheese
  • Add Stonevy Shedded Smoked Gouda cheese to the bowl. Mix with half of the bacon bits, garlic powder, salt, and pepper by hand with a spoon.
    1 cup Stonevy Shredded Smoked Gouda cheese, 1/4 tbsp salt, 1/4 tbsp pepper, 1/4 tbsp garlic powder
  • Top with the remaining bacon bits and sliced green onions (optional).
    2 green onions for garnish, chopped, 1/2 cup Real bacon bits - lightly pan fried/toasted
  • Chill for about 30 minutes before serving to let the flavors intensify, or let it out about 30 minutes before serving of less firm cheese spread consistency. Serve with Pretzels, French bread, or crackers

Notes

We served ours with pretzel pieces!

Delivering a symphony of Smoke and Flavor

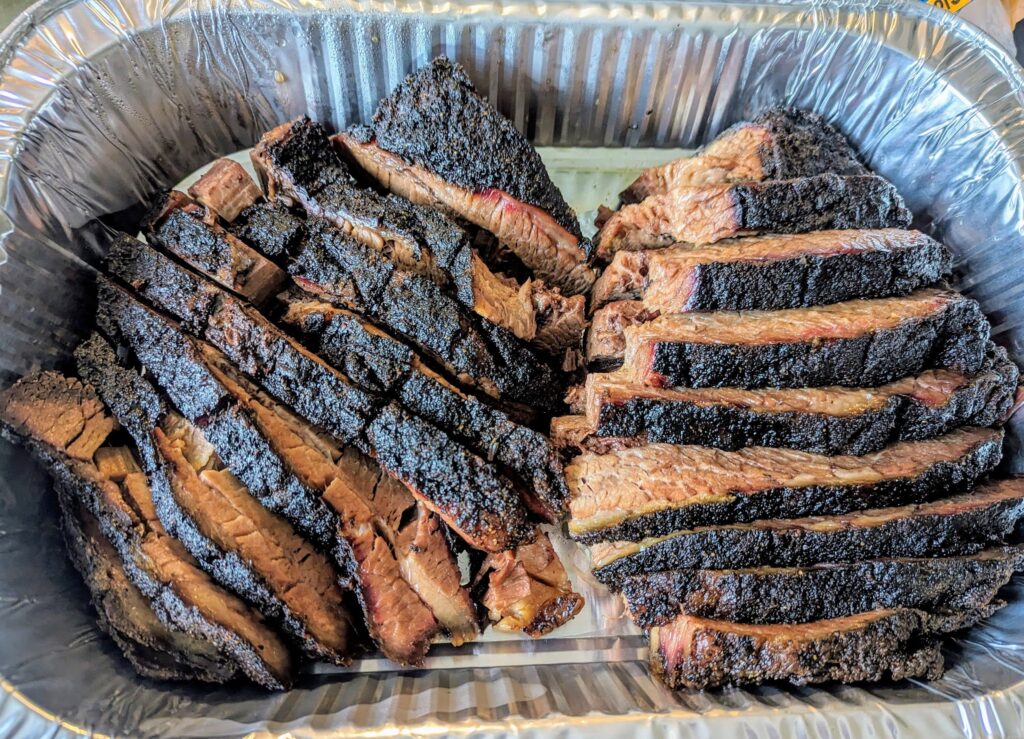
We recently had the pleasure of delivering a catering order that showcased the very essence of our culinary philosophy. From the succulent smoked beef brisket to the tender whole smoked chicken, every dish was crafted with love and a commitment to delivering a memorable dining experience.

Smoked Beef Brisket:  Our smoked beef brisket is a labor of love, slow-cooked to perfection until it reaches that melt-in-your-mouth tenderness. After hours in the smoker, we take the extra step of resting it in the oven for a full 24 hours. This process allows the flavors to deepen, creating a brisket that’s not just smoked but truly infused with the essence of the hardwood. The result? A masterpiece of smokiness and succulence that will leave you craving more.

Whole Smoked Chicken:  Our whole smoked chicken is a true crowd-pleaser. Treated with a two-step process to ensure irresistibly crispy skin, the meat beneath remains juicy and succulent. The smokiness permeates every bite, creating a dish that is a celebration of simplicity and bold flavors, a true embodiment of our commitment to quality ingredients and expert technique.

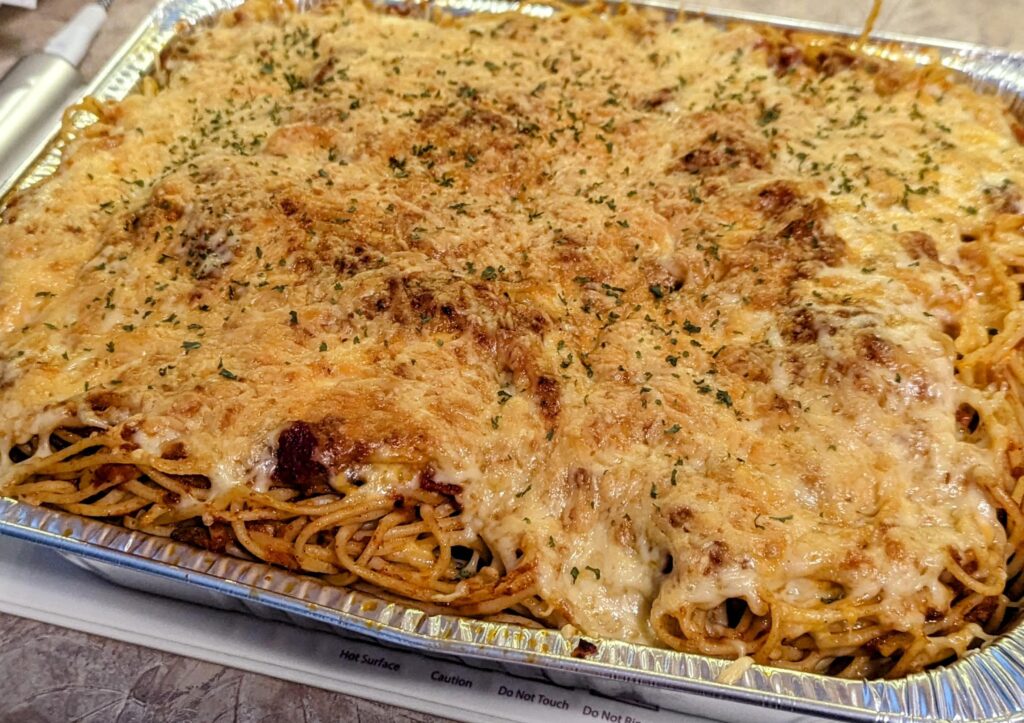
Smoked Gouda and Marble Pasta: Elevate your pasta experience with our smoked gouda and marble pasta. The smokiness of the gouda melds seamlessly with the tomato sauce, creating a dish that’s both comforting and sophisticated. To add an extra layer of indulgence, the pasta is melted on top, resulting in a harmonious blend of textures that will leave your taste buds dancing.

Coleslaw:  Our coleslaw is a refreshing counterpoint to the hearty smoked meats. Crisp cabbage, carrots, and a light yet creamy buttermilk dressing come together to create a coleslaw that’s both crunchy and flavorful.


Curious to experience the magic of our home kitchen for yourself? Contact us for your next event or place an order for a delightful home-cooked meal. We look forward to bringing the warmth and flavor of our kitchen to your doorstep.

Crafting Herb-Infused Tallow with a Pressure Cooker


Crafting Herb-Infused Tallow with a Pressure Cooker

Herb-infused tallow is a versatile and aromatic ingredient that can add a burst of flavor to your culinary creations. Tallow, derived from beef fat, has been used for centuries in cooking and skincare. When infused with fragrant herbs using a pressure cooker, it becomes an exquisite ingredient that can elevate your dishes to new heights. In this guide, we'll explore the art of crafting herb-infused tallow using a pressure cooker, unlocking a world of flavors and possibilities in your kitchen.
Prep Time 2 hours
Cook Time 2 hours 30 minutes

Equipment

  • 1 Pressure cooker (Ninja foodi or Instapot)
  • 3 glass jars
  • 1 Cheesecloth or fine mesh strainer (I used 250 fine mesh strainer)
  • 1 funnel
  • 1 gravy separator optional

Ingredients
  

  • 2 lb High-quality beef fat
  • 1 yellow onion, roughly chopped in quarters
  • 1 rosemary
  • 1 bunch thymes
  • 2 bay leaves
  • 6 cloves garlic - smashed

Instructions
 

  • Trim the fat into smaller pieces, removing any excess tissue. This will ensure a cleaner and more flavorful end product. (Optional: if previous frozen, defrost a bit, then grind to smaller pieces)
  • Select aromatic herbs that complement the richness of tallow. Classic options include rosemary, thyme, onion, garlic and bay leaves. Wash and dry the herbs thoroughly to remove any dirt or moisture.
  • Ensure your pressure cooker is clean and in good working condition. Some pressure cookers have a specific setting for rendering fat, which can be very useful.
  • Place the trimmed fat pieces and the selected herbs in the pressure cooker. The amount of fat you use will depend on the size of your pressure cooker and the desired quantity of infused tallow. I've added a 1/4 cup water, but there may be no need to add water, as the fat will release its own moisture during the rendering process.
  • Close the pressure cooker and set it to a low-medium heat for 2 to 3 hours. As the fat begins to melt, it will release its rich flavors and incorporate the aromatic essence of the herbs. Avoid high temperatures that could scorch the fat or herbs.
  • After several hours, the fat will have fully rendered and absorbed the flavors of the herbs. Carefully open the pressure cooker and let the mixture cool. First strain through gravy separator, and also remove any excess water and keep only the tallow. Then strain the liquid tallow through a few layers of cheesecloth or 350 fine mesh strainer into glass jars. This will remove any solid residue, leaving you with a beautifully clear and aromatic herb-infused tallow.
  • Seal the glass jars and store the infused tallow in refrigerator. It will solidify as it cools. Optionally store the tallow upside down so that any moisture will solidify on the top when you open to jar. The infused tallow can be used in a variety of dishes, such as roasted vegetables, seared meats, and even baked goods. Its high smoke point makes it ideal for high-heat cooking methods.

Notes

Elevating Char Siu Pork with the Camp Chef Woodwind Pro 24 Smoker

Embarking on a smoky adventure, I recently delved into the realm of Char Siu Pork using the incredible Woodwind Pro 24 Smoker. Armed with a competition pellet blend of Oak, Cherry, and Applewood, along with the tantalizing combination of charcoal and cherry wood chips in the smoke box, I set out to create a symphony of flavors that would redefine the art of Char Siu.

Perfect Smoke Combination:

To ensure the utmost tenderness, I began by tenderizing the pork shoulder with a spiked tenderizer mallet. Afterward, I placed the pork in a vacuum-sealed container and allowed it to marinate in the refrigerator for 2 hours. This shorter marinating time would still infuse the meat with the essence of the Char Siu blend, while providing ample flavor development.

With the Woodwind Pro 24’s exceptional versatility, I loaded the hopper with a blend of Oak, Cherry, and Applewood pellets, laying the foundation for an exquisite smoky flavor profile. To further enhance the aromatic experience, I introduced charcoal and cherry wood chips into the smoke box. This combination created a multi-layered smoky richness that would take the Char Siu to new heights.

Heating Up and Glazing:

Instead of slow and steady smoking, I decided to heat up the smoker to 350°F for a more accelerated cooking process. Brushing each side of the pork with a mixture of honey and marinate, I diligently turned the meat every 15 minutes until it reached an internal temperature of 165°F. This ensured a juicy and perfectly cooked result, with no additional searing required.

Adding Shine and Finishing Touch:

After reaching the desired temperature, I took the succulent char siu off the smoker and embarked on the final step. To enhance its visual appeal, I generously covered the pork with melted maltose, creating a beautiful glossy sheen that added a touch of elegance to the dish.

Tasting the Delights:

The moment of truth arrived as I sliced into the glistening Char Siu Pork. Each tender and flavorful piece showcased the perfect balance of sweet and savory notes, combined with the alluring smokiness from the Woodwind Pro 24’s pellet blend and the richness from the charcoal and cherry wood chips. The char siu had achieved a delightful caramelized exterior and a juicy, succulent interior that left an unforgettable impression.

Conclusion:

The Woodwind Pro 24 Smoker proved to be the ultimate partner in my quest to elevate Char Siu Pork. Its versatility, precise temperature control, and the ability to combine different smoke elements allowed me to create a truly exceptional dish. The accelerated cooking process at 350°F, combined with the honey-marinate glaze, delivered remarkable results, resulting in juicy, tender, and perfectly smoked pork. The final touch of melted maltose added a captivating shine to the char siu, elevating its presentation.

The Ultimate Snack: Smoked Brisket and Smoked Gouda Poutine


The Ultimate Snack: Smoked Brisket and Smoked Gouda Poutine

Introducing a delectable creation submitted by a friend of ours, Mslamkitchen, we present the mouthwatering recipe for Smoked Brisket and Smoked Gouda Poutine. This ultimate snacking experience combines the irresistible flavors of smoked brisket, rich gravy, and indulgent smoked Gouda cheese. Prepare to be blown away by this enticing dish that perfectly balances savory, smoky, and cheesy notes. Be sure to check out Mslamkitchen's Instagram (link: instagram.com/mslamkitchen) for more culinary inspiration and delightful recipes. Let's dive into the recipe and satisfy our cravings!
Prep Time 10 minutes
Cook Time 15 minutes

Ingredients
  

  • Homemade or store-bought fries
  • Smoked brisket, shredded or sliced
  • Smoked Gouda cheese, cut into small cubes
  • Gravy (homemade or store-bought)
  • Fresh chives, chopped (for garnish)

Instructions
 

  • Prepare your favorite homemade fries or cook store-bought fries according to the package instructions until golden and crispy.
  • While the fries are cooking, heat up your smoked brisket on the Stonevy Grill or in a skillet until it's warmed through.
  • Once the fries are ready, transfer them to a serving dish or individual plates.
  • Scatter the warm smoked brisket over the fries.
  • Distribute small cubes of smoked Gouda cheese evenly over the brisket and fries.
  • Pour your desired amount of gravy over the cheese, ensuring that each bite is coated with its savory goodness.
  • Garnish with freshly chopped chives for a touch of freshness and added flavor.
  • Serve immediately and enjoy the ultimate snacking experience of Smoked Brisket and Smoked Gouda Poutine!

Smoked Cheddar or Gouda Pasta Bolognese


Smoked Cheddar or Gouda Pasta Bolognese

Kelf
Indulge in the rich and smoky flavors of Smoked Cheddar or Gouda Pasta Bolognese, a tantalizing variation of the beloved pasta dish. Perfect for those nights when you crave a delicious meal but don't feel like spending hours in the kitchen, this recipe has become our go-to option for quick and satisfying dinners. Elevate your culinary experience by incorporating the distinct smokiness of Stonevy Grill's smoked cheese. This recipe combines the heartiness of a traditional Bolognese sauce with the creamy, smoky goodness of smoked cheese, creating a truly unforgettable dining experience.
Prep Time 30 minutes
Cook Time 45 minutes
Course Main Course
Cuisine American, Italian

Ingredients
  

  • 2 tsp Corn starch (for marinating the ground beef)
  • 1 tbsp Soy sauce (for marinating the ground beef)
  • 2 tbsp Olive oil (for mixing with drained pasta)
  • 8 oz Smoked Cheddar or Gouda cheese from Stonevy Grill
  • 8 oz Your preferred pasta (spaghetti, fettuccine, or penne) (use grinded cauliflower if on keto diet)
  • 1 lb ground beef
  • 1 large onions, finely chopped
  • 2 cloves of garlic, minced
  • 1 carrot, finely chopped (optional)
  • 1 celery stalk, finely chopped (optional)
  • 14 oz or 1 small can of crushed tomatoes
  • 24 oz (1 jar) of your favourite tomatoe pasta sauce
  • 2 tbsp ketchup
  • 1 tsp sugar
  • 1 tsp garlic powder
  • 1 tsp roasted garlic pepper
  • 2 bay leaves
  • Salt and pepper to taste
  • Dried parsley flakes for garnish
  • 0.5 tsp fennel seed (optional)

Instructions
 

  • In a bowl, combine the ground beef with 2 teaspoons of corn starch and 1 tablespoon of soy sauce. Mix well to ensure the beef is coated evenly. Set aside to marinate for about 15 minutes.
    2 tsp Corn starch, 1 tbsp Soy sauce, 1 lb ground beef
  • Cook the pasta according to the package instructions until al dente. Drain and set aside. Add and mix a little olive oil.
    2 tbsp Olive oil, 8 oz Your preferred pasta (spaghetti, fettuccine, or penne)
  • In a large skillet or saucepan, heat some canola oil over medium heat. Add the ground beef and cook until browned, breaking it up into small pieces with a wooden spoon.
  • Add the chopped onion, minced garlic, carrot, and celery to the skillet. Sauté until the vegetables are tender and the onions are translucent.
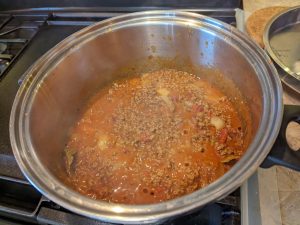
  • Stir in the crushed tomatoes, tomato sauce, red wine (if using), garlic powder, roasted garlic pepper powder, sugar, ketchup, bay leaves, and fennel seeds (optional). Season with salt and pepper to taste. Reduce the heat to low and simmer the sauce for about 30 minutes, allowing the flavors to meld together.
  • While the sauce is simmering, grate the smoked Cheddar or Gouda cheese from Stonevy Grill using a cheese grater.
  • Add pasta to baking dish. Once the sauce has thickened and the flavors have developed, pour or mix over the pasta. Spread the grated cheese all around top until covered
  • Set Oven to broil for about 5 minutes. Once heated, place pasta baking dish into middle rack and broil for 3 to 5 minutes.
  • Serve the Smoked Cheddar or Gouda Pasta Bolognese in bowls, garnished with dried parsley flakes. Enjoy the delightful combination of smoky cheese and robust Bolognese sauce, creating a harmonious marriage of flavors.
Keyword Pasta Bolognese, smoked cheddar, smoked gouda

Unboxing and First Impression Review: Iwatani Portable Gas Grill BBQ Stove ABURIYA2 CB-ABR-2

I recently got my hands on the Iwatani Portable Gas Grill BBQ Stove ABURIYA2 CB-ABR-2, and I couldn’t wait to unbox it and give it a try. Known for its exceptional build quality and versatility, this Japanese-made grill promised to bring convenience and delicious grilled flavors to my culinary adventures. Join me as I share my unboxing experience and provide my initial impressions of this portable gas grill.

Unboxing and Build Quality: Upon receiving the Iwatani Portable Gas Grill, I was impressed by its solid construction and attention to detail. The grill is well-built and showcases the renowned craftsmanship of Japanese products. From the sturdy materials to the thoughtful design, it exudes a sense of durability and reliability.

Versatility and Cooking Options: One of the standout features of the Iwatani ABURIYA2 CB-ABR-2 is its versatility. Whether I wanted to grill directly on the grate or enjoy yakitori-style cooking, this grill delivered excellent results. The ability to switch between different cooking styles added a layer of culinary creativity to my outdoor cooking sessions.

Pros:

The pros of the Iwatani Portable Gas Grill were evident from the start. Its impressive build quality ensured a long-lasting product that I could rely on for my cooks. The versatility it offered allowed me to explore various cooking techniques and expand my culinary horizons.

Cons:

While the Iwatani grill had many positive aspects, there were a few downsides worth mentioning. Firstly, it was disappointing to discover that the grill didn’t come with a carrying case or box for convenient storage and transportation. However, I noticed a small detail that Iwatani expects users to keep the box for future use. It’s important to open the box carefully on the side with the tab, as shown in the album pictures, so that the tab can be folded back in and the box can be used to store the grill.

Additionally, the stainless steel grill net proved to be challenging to clean thoroughly, requiring extra effort and time. Lastly, during my grilling session with Korean LA Galbi short ribs, I noticed excessive smoking, possibly due to the high fat content. It’s essential to consider proper ventilation and cooking under a strong range hood or in outdoor spaces to prevent smoke alarms from being triggered. Additionally, I found that the smoke was mainly caused by flare-ups from the marinade and fat dripping onto the grill. To mitigate this, it’s important to regulate the flame and avoid excessive flare-ups by adjusting the heat accordingly.

Furthermore, when I finished grilling outside and moved the grill indoors for cleaning, I inadvertently forgot that the water pan was quite full and ended up spilling it. Therefore, it’s crucial to be mindful of the water pan’s water level and handle it with care to avoid any accidents or spills.

Overall Impression:

The Iwatani Portable Gas Grill BBQ Stove ABURIYA2 CB-ABR-2 provided a convenient grilling experience that surpassed traditional charcoal grills in terms of convenience and ease of use. Its exceptional build quality and versatile cooking options made it a valuable addition to my outdoor cooking arsenal. However, it’s important to consider the potential smoke production and take necessary precautions such as cooking under a strong range hood or in well-ventilated areas. Additionally, keeping the box for storage purposes and opening it carefully on the side with the tab ensures that you can safely and conveniently store the grill after each use.

Remember, while using the Iwatani Portable Gas Grill BBQ Stove ABURIYA2 CB-ABR-2, it’s always recommended to carefully read and follow the manufacturer’s instructions. Additionally, utilizing Google Lens or any translation tools can be helpful for understanding any instructions or labels on the equipment. Enjoy your grilling experience while prioritizing safety and being mindful of potential smoke production and water pan handling.

Please stay tuned for a more detailed review as I continue to explore the capabilities of the Iwatani Portable Gas Grill BBQ Stove in future cooks!
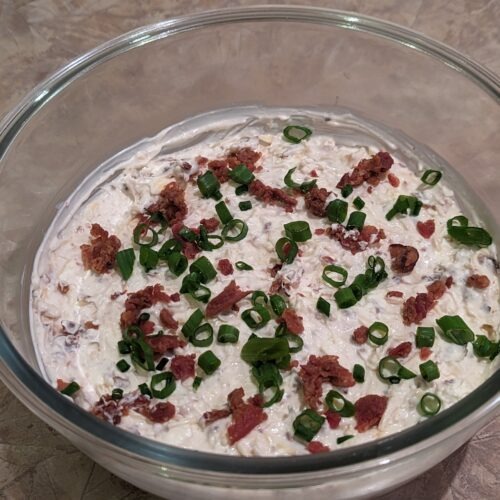
Camp Chef Woodwind Pro 24 – first impressions

I couldn’t contain my excitement when I discovered that the newest Camp Chef Woodwind Pro had finally made its way to Canada. After an arduous search, I managed to get my hands on one, and it was an unboxing experience like no other. Although the grill came pre-assembled, I watched the official assembly video beforehand (link: https://www.youtube.com/watch?v=IS4VP7QupQ8&ab_channel=CampChef), just in case I needed to disassemble it for transportation. As luck would have it, I had to take it apart and put it back together at home. Reassembling the 24-inch beast was surprisingly easy, even as a solo endeavor. The only challenge was finding a tall enough chair to place the hopper on, allowing me to smoothly slide the firebox from the hopper side into the main grill.

This review reflects my initial impressions, and I will provide a more detailed review after conducting several more cooks.

Unboxing and Assembly

Once the assembly was complete, I found myself hesitant to fire it up for the initial burn, knowing that it would never look this pristine again. I couldn’t resist capturing the moment and ended up taking an entire album of photos to commemorate the occasion.

Impressive Features

The Woodwind Pro boasts several new features that truly won me over:

  1. High-Quality Build: From its stainless steel construction to the double-walled door and additional gasket around it, this grill is built to last.
  2. Versatile Smoke Box: The new smoke box allows for a variety of smoking options. Whether it’s adding charcoal, wood chunks, wood chips, or pellets, you can easily customize your smoke flavors.
  3. Cold Smoking Capability: As someone who frequently smokes Gouda and Cheddar, the ability to cold smoke is a game-changer. The fan-only mode opens up possibilities, and I’m excited to experiment with the smoke tube, smoke box, or both!
  4. Upgraded Vents: Instead of the traditional chimney, the Woodwind Pro features two vents at the back, providing better control over airflow and temperature.
  5. Convenient Ash Clean Out: With the inclusion of an ash cleanout cup, maintaining cleanliness is a breeze, eliminating the need for constant ash vacuuming.

Room for Improvement

While the Woodwind Pro exceeded my expectations in many areas, there were a couple of minor drawbacks:

  1. Wi-Fi Functionality Limitation: The grill’s app allows you to make temperature adjustments, control smoke levels, and turn off the grill, but disappointingly, it lacks the ability to turn on the grill remotely.
  2. Pellet Cone of Death: Although the hopper’s window was a nice addition, my first cook encountered a common issue known as the “cone of death,” where the pellets feed down the auger in the center but get stuck around the sides.
  3. Split Upper Level Racks: The upper-level racks had a tendency to shift, which posed a slight challenge when maneuvering heavy briskets.

Conclusion

This review is based on my initial experiences with the Camp Chef Woodwind Pro. I plan to conduct several more cooks and delve deeper into its capabilities before providing a comprehensive review. However, based on my initial impressions, the Woodwind Pro has proven to be an exceptional addition to my smoking arsenal. Its exceptional build quality, versatile smoking options, and convenient features make it a top contender in the world of pellet grills.

Stay tuned for my in-depth review where I will share detailed insights, tips, and recipes to make the most of this remarkable grill. In the meantime, remember to share your experiences and tips in the comments below! Happy grilling!

Exploring Different Techniques for Char Siu

Welcome to my culinary sanctuary, where I uncover the exquisite nuances of char siu. With each dish I create, I strive to unlock the secrets behind its tantalizing flavors. In this exploration, I’ve discovered that rotisserie-cooked char siu over charcoal, complemented by a touch of hickory, presents an unparalleled culinary experience. While this technique works wonders for smaller portions, I’ve yearned to conquer the challenge of preparing char siu in larger quantities. Join me as we delve into the artistry behind this beloved dish and unveil its true potential.


Rotisserie is the best!

Experiment 1: Low and Slow Sensations In my pursuit of char siu perfection, I embarked on a traditional approach—a slow and gentle process. Cooking the char siu on a rotisserie over charcoal at a mild temperature of 200°F, I allowed it to bathe in flavors for a generous 3-4 hours. A brief sear over the charcoal completed the transformation, capturing the essence of smoky goodness. While this method demands patience and precision, each turn and spritz with apple cider vinegar resulted in a captivating smoke ring. Although the texture leaned slightly towards the drier side, the flavors remained a captivating medley of taste.

Experiment 1 – slow smoked

Experiment 2: Embracing the Flames Driven by the pursuit of succulence, I turned up the heat for my next endeavor. Employing a higher temperature of 350°F, I aimed for a shorter cooking time of 35-45 minutes, ensuring the internal temperature reached around 155°F. Dancing over the charcoal, the flames imbued the char siu with irresistible tenderness and moisture. Although the charcoal sear may not have been as pronounced due to settling flames, I considered the possibility of broiling the char siu in the oven for larger-scale production. This time, I experimented with apple wood pellets, infusing a delicate hint of fruitiness into the succulent meat. Future experiments hold the promise of exploring diverse combinations of hickory and apple wood to uncover new dimensions of flavor.

Experiment 2 – fast smoke, then char

Experiment 3: The Beauty of Simplicity Sometimes, the simplest approach can yield culinary marvels. In my quest for convenience without compromising taste, I ventured into the realm of charcoal kettle cooking. Operating at approximately 375°F, the char siu cooked indirectly in the kettle for 35-45 minutes. The result? A splendidly cooked, flavorsome delight. While this method may lack the distinctive smokiness of previous techniques, a quick sear over the charcoal added an enticing charred essence to the dish.

Experiment 3 – indirect, then char over charcoal

Each experiment has been a remarkable journey of culinary discovery, revealing the distinct qualities of various cooking methods. While each approach has its merits, I personally find myself drawn to Experiment 2. Its high heat intensity delivers a perfect balance of speed and flavor, allowing me to create delectable char siu in larger quantities without compromising on taste. This method showcases the epitome of tenderness and succulence, enticing even the most discerning palates. As I navigate the captivating realm of char siu, I eagerly embrace the possibilities that lie ahead—exploring different wood combinations, refining marinating techniques, and embracing diverse cooking styles. Together, let’s embark on a culinary odyssey, unlocking an extraordinary palette of flavors and taking our char siu experience to new heights.

From left the right, experiments 1, 2 and 3